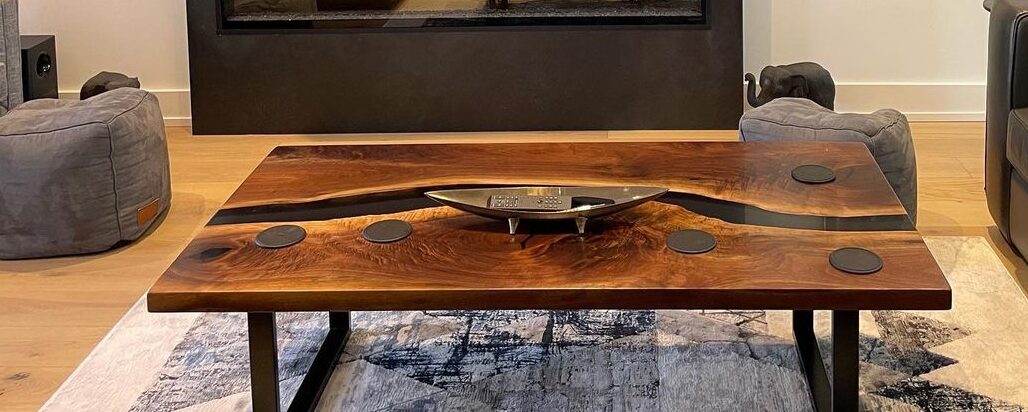
5 Essential Tips for Making Better Live Edge Furniture
If you’re passionate about woodworking and want to elevate your live edge table game, you’re in the right place. Live edge tables have unique charm that combines the raw beauty of wood with functional design. Whether you’re crafting a coffee table, dining table, or custom piece, there are a few key things to keep in mind. Here are five essential tips to help you create stunning live edge furniture, including material selection, design, and finishing.
- Ensure Your Wood Is Properly Dried
Before diving into your live edge project, the most important step is to make sure your wood is dry. Wood can hold a significant amount of moisture, and if it’s not dry enough, it will warp, crack, or shrink over time.
- How to Check Moisture Content: Use a moisture meter to check the wood’s moisture level. Kiln-dried wood is usually ready to go, but if you’re working with wood from local suppliers or craigslist, a meter will save you from any potential disappointment. Aim for a moisture content of around 7-9% for furniture-grade wood. Anything higher could lead to movement as the wood dries over time, which will affect the stability of your piece.
- What to Do If It’s Too Wet: If the moisture content is too high, let your wood acclimate in your shop for a few weeks. Sticker the slabs to promote airflow and give the wood the time it needs to dry out properly.
- Stabilize Your Wood to Prevent Warping
Live edge tables are stunning, but the wood’s natural tendency to warp, cup, or twist can be a challenge. To prevent this, stabilization is key.
- Use Metal or Wood Stabilizers: A sturdy metal base is one popular method of stabilizing your project, but you can also use wood stabilization techniques. For example, inserting C-channel steel helps keep the slab flat while still allowing it to move. The C-channel method involves routing grooves into the wood, inserting threaded inserts, and securing the C-channel to help the wood maintain its shape.
- Why This Matters: Wood movement, especially along the grain, can cause your piece to distort if not properly stabilized. Using these techniques keeps your piece functional and beautiful, allowing you to preserve the integrity of the live edge.
- Let the Wood Speak to You – Embrace the Imperfections
Live edge wood is all about celebrating the natural imperfections in wood. Don’t shy away from knots, voids, or cracks – instead, use them to enhance the beauty of your piece.
- Embrace the Voids: Instead of trying to hide or cut out imperfections, let them become a part of the design. You can fill cracks or voids with epoxy, creating stunning accents. Epoxy can be clear, colored, or even patterned to match your aesthetic.
- Use Inserts for Visual Appeal: Another great way to incorporate the imperfections into your design is by using wood inserts, like bow ties (Dutchman inlays). These inlays not only stabilize cracks but also create a striking visual element that adds character to the furniture.
- Think Creatively: The key to working with live edge wood is to let the wood guide you. Sometimes, what starts as an unexpected void or crack can end up being the focal point of your piece, as seen in many resin river tables where the wood’s natural contours dictate the design.
- Prep Your Wood Surface for the Perfect Finish
A smooth surface is critical to achieving a flawless finish on your live edge tables. To get the best results, take your time during the preparation stage.
- Get Rid of the Bark: Don’t leave the bark on your live edge slabs. While it may look rustic at first, bark continues to decompose over time, which can cause problems later. Remove it before you begin finishing.
- Start with Coarse Sandpaper: After flattening your slab, begin sanding with 80-grit paper. This removes rough spots and prepares the surface for finer sanding. Always sand with a vacuum system to remove debris, ensuring a cleaner finish.
- Avoid Swirl Marks: Use a pencil or chalk to mark the surface before sanding, which helps ensure you don’t miss any areas. Also, slow down your sanding process to avoid swirl marks. If you do see any, use a low-angle light or mineral spirits to highlight and eliminate them.
- Apply the Right Finish for Lasting Results
The right finish is the final touch that will make your live edge furniture shine. A good finish will protect the wood and enhance its natural beauty. Here are a couple of great options to consider:
- Rubio Monocoat: This is a popular choice for live edge furniture because it’s easy to apply and doesn’t require a spray booth. It’s a single application, oil-based finish that protects your wood without altering its natural look. Plus, it’s easy to repair if necessary.
- Enduro-Var by General Finishes: For a more durable finish, Enduro-Var is a great option. It’s a water-based finish that works well on a variety of wood types and is suitable for both hand-applied and sprayed applications.
- Application Tips: Make sure your wood is properly sanded and clean before applying any finish. A smooth, dust-free surface will ensure the finish adheres correctly and creates a beautiful, even sheen.
Conclusion
Making live edge furniture requires a mix of creativity, craftsmanship, and knowledge of the wood you’re working with. By following these five tips – from checking moisture content and stabilizing the wood to embracing the natural imperfections and finishing the piece with care – you’ll be able to create stunning, functional pieces that highlight the unique beauty of natural wood. Whether you’re a seasoned woodworker or just getting started, these tips will help you take your live edge projects to the next level.
lets talk live edge wood slabs
Feel free to call or text Mike at (416) 618-0081
